Friday, October 16, 2009

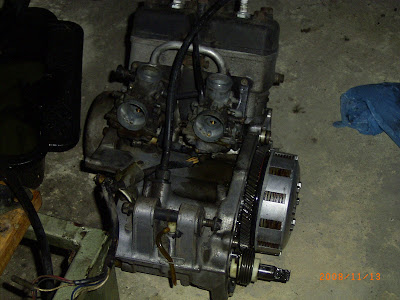
I will take a couple more pictures with a better back ground.
After putting the bike back together there was quite a quite
a considerable oil leak. There was an oil leak before I started
but when I finished the bike the leak had got worse.
I kept putting the job off but finally got round to tackling it.
after investigation found out the leak was coming from the gear
leaver shaft. There is a inner and outer shaft oil seal. I decided just to change the
outer seal. The cost was 13 dollars and the job took about 30 mins.
No more oil leaks.


Weathers warmed up and managed to get the spraying Finnished.
I'm not entirely happy with the finished result. I think I will spray the bike again ,
and hopefully with the experience I picked up this time round I will have a more
Professional finish.


Friday, July 03, 2009

Final Stages

The bike so far paint work has been primed ready for the top coat, I'm thinking of spraying it black. I'm stuck at the moment because it's winter and a bit cold to spray outside. If I can hang on I'll wait till spring and have a go then. next job is to fit the exhaust pipes and start her up, hopefully.


Bit of a jump in progress here. The battery has been fitted and the electrics checked, had to re-wire the indicator switch on the handle bars as all the wires had fallen off, you get that on old bikes. The radiator has also been fitted. need to re-spray the right side of the radiator as its a bit dull and I'm thinking that I might leave the radiator cowling off, I'll see what it looks like off and on.


Another picture with the engine fitted. Next job was cleaning the carbs something I was not looking forward too, they were very dirty, I used degrees er and a stiff brush.


Engine has been cleaned. As you can see the side crank case has had the paint removed and the alloy polished.

My son (Aiden) and I fitted the engine. As the bike is raised off the floor it was easy to fit, but using two people saved scratching the frame.


Tuesday, May 05, 2009

Wheel treatment

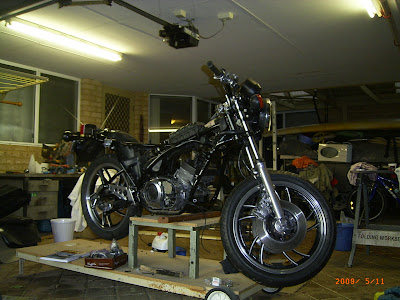
Bike with the wheels fitted. Now its starting to take shape next job


next job is to clean up the engine. The engine is sitting on the table


behind the bike ( by the head light) Should have the engine cleaned


within a few weeks along with the side engine cases.


Front wheel after clean up and fitted to the forks. Not sure how the


brake caliper's will hold up to the heat they may discolour, time will tell.


This is the rear wheel after the clean up. As you can see I polished the the


center hub using the wet and dry 600 then the 1200 and finished up with


the metal polish. The sprocket was also scrubbed with degrease.


The rear wheel was also a mess. The sprocket was removed to allow easy access.


the wheel was then cleaned the same way as the front wheel below.


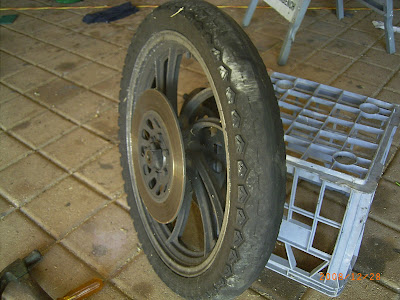
The front wheel before the clean up.


As you can see I got my moneys worth out of the tyre.


To clean this wheel up I removed the Brake disc's and replaced the tyre.


I replaced the tyre prior to the clean up as i was concerned that the new paint


might be chipped when the new tyre was fitted, but I think in hien sight


I should haveremoved the tyre cleaned the wheel up then had the


tyre fitted. The wheel was thoroughly cleaned with a heavy duty


degreaser. Next I rubbed down the rim and spokes with wet and


dry paper 600and then 1200, the rims were then polished using a mop


attached to my hand drill, then by hand using Mother's metal polish.


When all the exposed alloy was polished I masked the alloy


rims with masking tape. The spokes were also masked with


masking tape, the tape was stuck to the spokes and then trimmed


with a sharpknife. This was done to both sides of the wheel.


I then sprayed the wheel with two coats of gray etching primer,


When the primer was dry the wheel was sprayed with two


coats of chassis black gloss. The masking tape was removed


when the blackpaint had dried but not gone hard.


The Inside of the disks were rubbed down and sprayed


with Black heat resistant paint.


Thursday, January 08, 2009

Yamaha rd250 restoration

In these photo's you can see the trolly i knocked up. This made it a lot easier moving the bike around
The front is almost complete, I have just had a new front tyre fitted and am in the proses of cleaning up the wheel.

The front forks were cleaned up earlier but i forgot to document that part of the restoration. I have loosely fitted the brake calipers ready for the wheel.


Same part as below different angle


This is after the paint stripper. At this stage I had used some wet and dry paper, started with 240 and finished with 1200.


same part as below different angle.


With the caliper apart I started with the paint stripper.


As per picture below at first is was thinking of a quick rub down and spraying with caliper paint. I decided to spend some time cleaning and polishing to see what kind of result was possible.


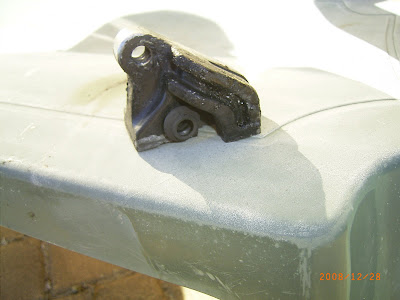
This is one of the Brake calipers before cleaning up, as you can see it is in crusted with grime and grease.


Thursday, December 04, 2008

Frame restoration


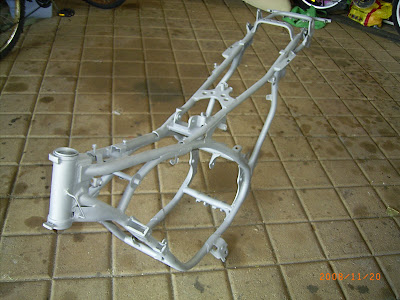
When the sand blasting was complete I weighed up the time and space for spraying the cost of powder coating $80 and the finished result. I decided to go with the powder coating, as you can see the frame looks superb it look like its been plastic coated unbelievable I am over the moon with the finished job $8o well spent.
Two things worth mentioning and I'm sure its obvious to most people is remove all plastic parts from the frame like swinging arm bushes. I was caught out $62 for new bushes money wasted. The other is when having something power coated threaded screw holes and hole tolerance are reduced and work is required to remove the powder coating. I had trouble fitting the swinging arm bolt holes had to be opened up and the bushes were a very tight fit.

I phoned around a few sand blasting companies and got a price of $80 dollars. This price I deemed except able as the frame is the centre of the bike. Individual parts can be taken off and revisited but the frame has to be right from the start.

This is the frame after sand blasting. What a difference. Apparently this is what raw metal looks like. The frame looks like it has been primed.

At this stage I picked up the frame and done some Minor welding to the center stand brackets and the steering limitation stop. I took the frame back to the sand blaster the next day I also took the swinging arm for blasting.


Engine out

With all the parts removed from the frame I decided to it rub down and prepare the frame myself, still trying to save money were possible. This picture shows my rubbing down effort. After about an hour with the wet and dry paper I realized it was a bigger job than expected. I am trying to complete this project on a budget but think Time to enquire about sand blasting. One thing I have leaned so far during this project is to explore all avenues on how to complete the job in hand, weighing up time, money and finished result.
Here's another pic of the rubbed down frame, but as above I was not happy spaying the frame at this time as the frame needed more time and effort.

here's a picture of the engine, side covers have been removed. Taking the engine out will give me a good chance to clean it up.


Side view of the bike, engine removed. It was relatively simple to remove the engine, a one man job. Still a lot to remove. Since buying a manual and starting to put the bike back together I realise the shock absorber should have been removed complete with the swinging arm, but lessened leaned. The front forks are still to be removed. If you look closely you can see the removed engine sitting on the floor behind the frame.


The engine has been taken out. The frame still has a lot of other bits connected. These parts will be removed so the frame can be rubbed down and resprayed.


Tuesday, December 02, 2008

The start of the restoration

At this stage of the project I was convinced a good clean up would do. I have covered the engine with a plastic bag and was going to paint the frame with the engine in situ. I was unsure about taking the engine out as i was not sure of the work involved. I decided there and then that if I was going to take the time and effort to remove the engine that it was worth doing a proper job on the bike. As it turns out it took less than half an hour to remove the engine.

Sunday, November 30, 2008

Yamaha RD250lc project

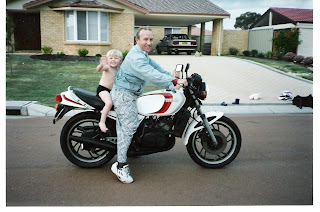
I bought the bike in 1996. I needed cheap transport for to and from work, but the transport could not be boring. After looking round the bike shops I came across a 1981 Rd250lc. This bike was all the rage when I was in my late teens and brought back many fond memories. It was in good condition and cost $1500 which matched my budget.Great I thought, a two stroke motorbike, not to many moving parts to go wrong.Nice and reliable and a bit of fun as well.

It is now 12 years later and the bike's been ridden every day, come rain or shine. I could not have chosen a better bike as over the years it's been practically trouble free. No preventative maintenance has been done, tyres and sprockets were changed when needed Apart from that she just kept going and going.

Now 12 years down the track she's looking pretty tired and old. I was fortunate enough to get a car for work so now is the time to pay her back for the great service she had done me over the many years. After reading many other peoples blogs I realise I am not alone when I say what started out as a wash and brush up has turned out to be a major project and very enjoyable I might add. I decidedto blog after I was a fair way thought the project as I did not realise it was going to be such a big job, so the the blogging starts when most of the parts had been removed from the frame. Please enjoy my journey as it unfolds.